Tuesday, June 10, 2014

2014 Santa Sack Swap


Apparently the time has come for the 2014 Santa Sack Swap for 2014.  This is my first time participating in this swap although I have done other swaps with Cheryll click here to go see her blog.

Thanks again Cheryll for organising this, its going to be fun...  to see the swap just visit Santa Sack Swap

My partner for this year is Simone, from Forde NSW Australia.  I have just emailed her to say hi.

Happy Stitching until you next visit

Sharon

Monday, June 2, 2014

Curved Piecing tutorial

This post I thought I would show a tutorial for curved piecing and the simple items I need for sewing curves.

Sometimes we make things harder than they actually are and we need to tell ourselves we can do it!

First the items I need for inserting my mariners compass into a circle to square up the block.

Join your templates to create the square that has a circle cut from the middle.  Then get 8 pins and a stiletto or a seam ripper.


items required
Pin the circle onto the compass at each half way point then in the
quarter points
Place the circle under the sewing machine and sew a quarter inch seam.
Use the needle down position. Hold the stiletto to gradually sew 2 inches at
 most to sew the circle onto the curve. Gently pull the to pieces of fabric
 together and hold with fingers and stiletto, it helps to have a knee lift
on your machine for this also.
As you carefully curve the fabric around each pinned section, you will
 find it fits, just deeps breaths and believe in yourself.
Another helpful hint is to spray starch your fabric as this holds the
 bias in place.
Ta Da fitted into the circle with straight edges to sew into a quilt.


The finished circles ready to sew together for a wall hanging.


Happy Stitching until next post

Sharon


Sunday, June 1, 2014

1 xmas item a month

I have just looked at the last post I made at it was 16th may, wow so sorry I haven't been posting, but I have been sewing and tending to sick children, along with the normal chores and taxi services required.....
Tis the season - Four Blocks complete
This post is for my xmas item a month, I haven't got a North pole Block ready but I have been stitching the Tis the Season and I have started sewing the borders around the blocks.  I have decided to do all the remaining blocks and prepare the borders around them all to ensure that I get the stitching in the right place.

I have also made a purse, that was sitting in the ufo box to go into the xmas box.

Back of small purse

Small Purse - Red Home Book

Friday, May 16, 2014

hexagon addiction

I have Block One and Two prepped for sewing together in the QAL  over at Faeries and fibres 

These are addictive so be careful.  I purchased the two fabrics for the pathway between today.   I will prep some hexies up and show you next visit...

Block Two

Block One
Happy Stitching until next visit...

Sharon

Sunday, May 11, 2014

HAPPY MOTHERS DAY

Happy Mothers day to all those fabulous helpful MOTHERS!

I received this delightful card from my eldest DD, a reminder for me that they still need you to be there!....

Thanks for all the fun times we have had....


Now who would have guessed I needed another project, but I couldn't help myself... I have always loved hexagons and these are just gorgeous.. go check out karens site...
 
Until next visit..
Happy Stitching
Sharon

Friday, May 9, 2014

Paper Piecing hexagon tutorial

There seems to be hexagons everywhere these days so I thought I would put together a quick run down on some options for paper hexagons.  They are quite addictive so please be aware they may take over your life....
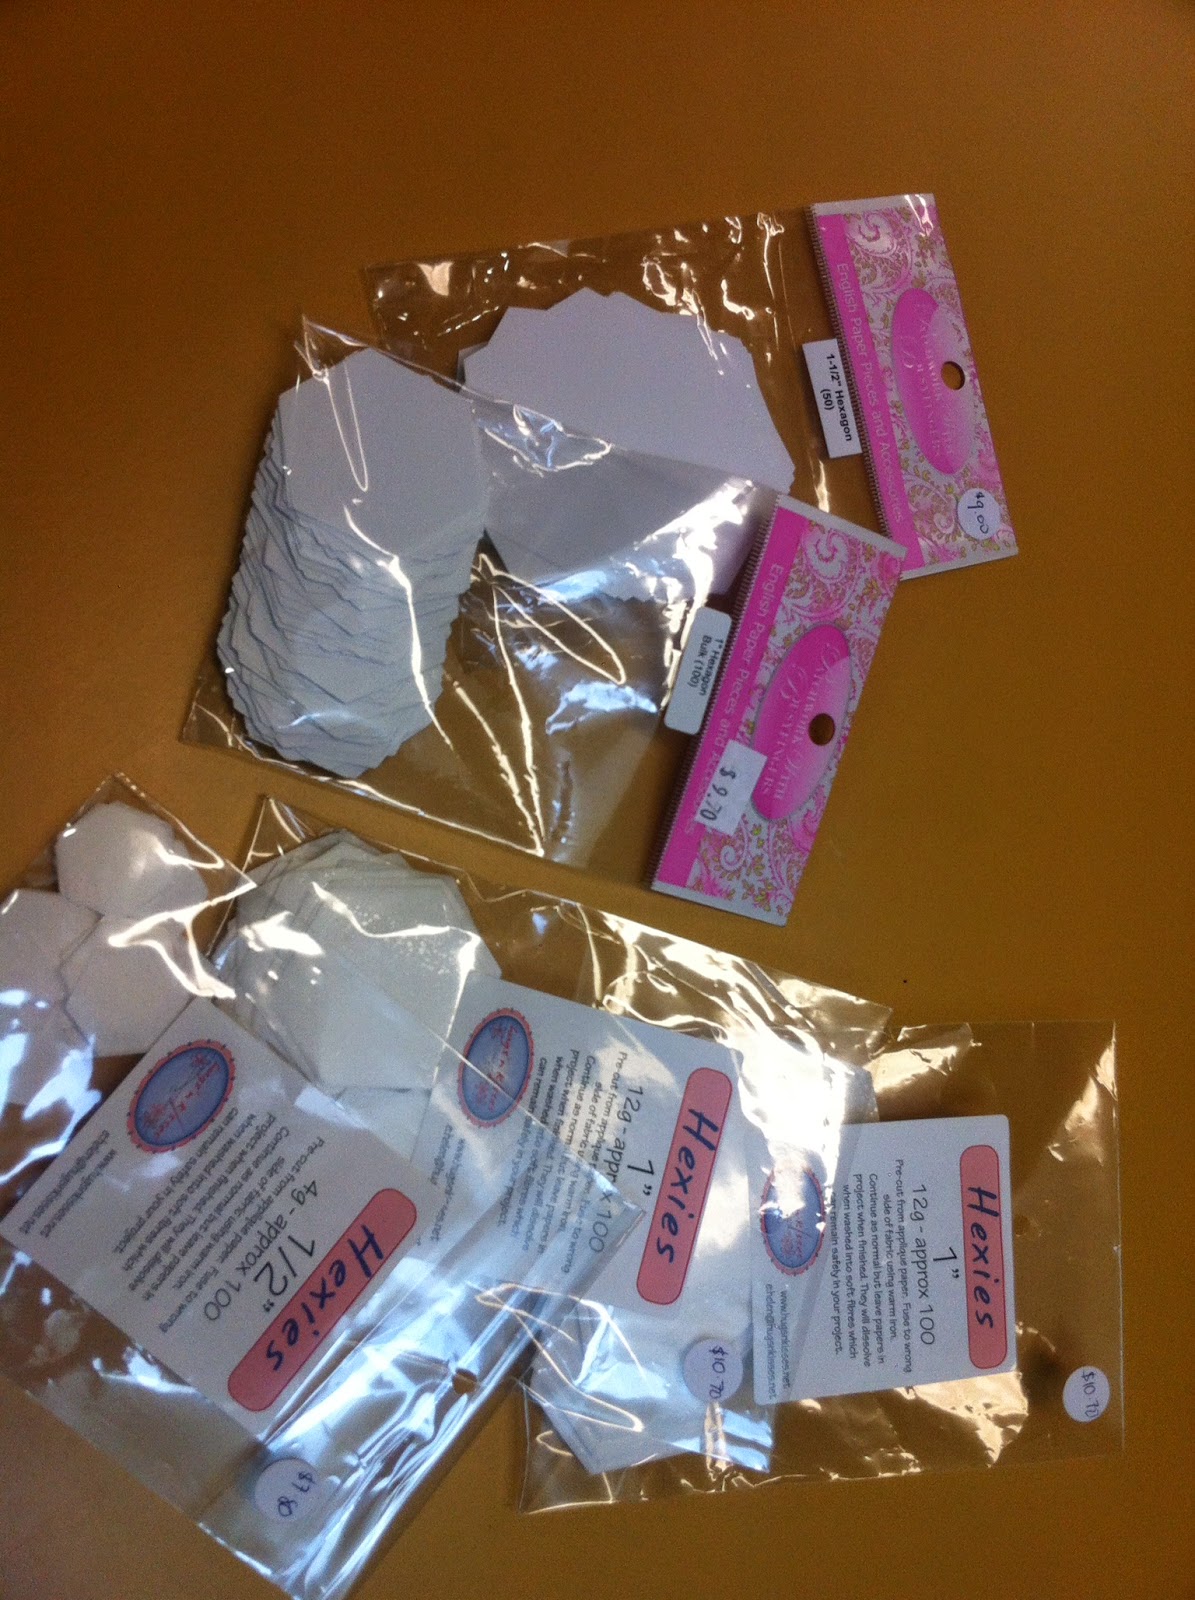
Paper Piecing papers available at www.busyfingerspatchwork.com
These washable papers can be left in and do not need to be removed once project is complete.
fusible washout hexagon papers available at
www.hugsnkisses.net
These are new punches from Fiskars.  You can get different size punches. This can save money over the long term.  I just save all the insert cards from magazines for subscriptions and use these.

Mark your hexagon shapes onto the fabric and cut out.  Remember if you don't have a fabric template you need to remember 
to cut 1/4" more than the size of your hexagon papers.


Option One for Preparation - Use a sewline Glue pen.  Glue the edges of the papers be sure to not put too much glue on as this will make it difficult to remove if you have loaded the glue on.  Just put on the edge of the papers.
Fold the fabric over the papers and then slightly glue the fabric corners so they will stick when folded over.


Threads... I use these superior threads Egyptian cotton donuts, they have all the colours and are prewound.  Handy and easy to carry around.

Another way to prepare your hexagons is to sew the corners of the fabric but not go through the papers, this way you can sew them together and not worry about removing the tacking stitch when complete, as you do not see the tacking stitches this way.  Take a small stitch in the corner of the fold of fabric, holding between your thumb and forefinger,  then turn around to next corner having the thread reach across on top of the fabric to the corner take another small stitch through the fabric only.  Keep going around until you get to the corner you started at, take another couple of small stitches through the starting point and then snip off.

The third and final way is to tack the fabric on to the papers by going through all the layers.  (this way means you need to remove the tacking when you have completed sewing your shapes together.)
Put your needle through the paper and fabric at the corner fold making sure that the knot is on the right side of fabric for easy removal.  Keep going around and tacking at the corners but making sure you take a small stitch all the way through the papers and back to wrong side again.  Finish going around and secure thread with a couple of stitches before sniping off.


Joining the prepared hexagons together, I always start slightly in from the corner (this is to ensure all the knots do not meet together in a corner. Then I go back to the corner with small stitches then forward to the other end. Making sure the stitches are small and not largely spaced you will find that they are hidden on the right side.

Joining corners together, this means sometimes you will have to slightly fold the papers to fit together to stitch, remember to take small stitches.  Once complete then open out.  Remove all papers after sewing together or if you have used the fusible papers leave in as they will slightly disappear in the wash.


You can make all number of shapes by slotting together the shapes into various designs.


 Happy Stitching Until next time

Sharon


Sunday, May 4, 2014

Holidays are over, back to the stitching cave

As my DH managed to suggest I was happiest in my woman cave!!  yes I got to look and sit in the sewing studio (such fun), it has been a hectic two weeks school holidays, but I quite like getting back to old clothes and old potatoes!

I had a parcel on the doorstep when we flew back from Wellington today!  A much awaited parcel which contained 2yd of fabric for the binding to match my border of my Red Home applique quilt.  I found this meterage by looking on find my fabric and this site matched me up with Rossville Quilts
and I found the much needed meterage to finish binding this quilt which has been finished for a while.  Yippee another finish will happen. But I must confess I did add a few xtras!  well there is no use paying for postage when I could get more for the same postage now is there!

The spots are the binding(minick and simpson) a piece of chocolat and fat quarters of William Morris, along with the new ladies album reproduction fat quarters from Barabara Brackman

These lovelies were discovered in Dunedin at the Whitcoulls closing down sale in the mall.  Well 50% off just too good to ignore!
 
Not much stitching has been happening apart from the North Pole block and tis the season blocks for my 1 Xmas Item a Month.

Happy Stitching  thanks for visiting
Sharon